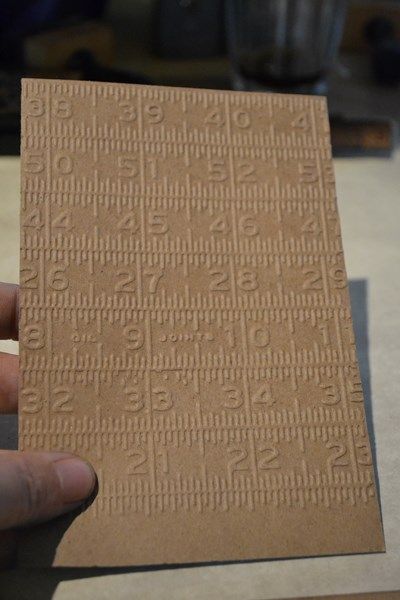
Last week I had one of those.. hmm I wonder if this could work thoughts.. I thought I'd try and see what would happen if I embossed some cardstock first with an embossing folder and then with embossing powder. So I decided to give it a go.. and this was the result..
So I thought I'd share with you all here the very easy steps of how I did it.. :)
I first cut my kraft cardstock to my desired size, then ran it through one of my favourite embossing folders.
I run mine back and forwards through my machine, just to make sure I get a nice crisp clear raised image.
The next step is to gently swipe your embossing ink over the raised parts of your embossed design. I find it works best if you have your cardstock sitting on a flat hard surface like your desk.
Next step was to sprinkle with your embossing powder, shake off any excess powder, and then heat set it.
I then cut my double embossed design into strips.
The last thing I did was to ink them with various colours of distress ink.
They are then ready to add to your card, layout or project.
I hope you enjoyed my little tutorial, and would love to see if you have a go at using this technique.
I hope you have a wonderful day, and hope to see you back again soon :)

+(640x511).jpg)


This is fabulous. I saw it on Pinterest.
ReplyDeleteThanks for the tutorial!
Very effective Karen. I love your tag. I look forward to seeing more of your inky creations on your new blog :)
ReplyDeletelovely idea
ReplyDeleteLove this technique. Want this folder now too!
ReplyDeleteCongratulations on your shiny new blog!
Hugs
xx
if you leave your card in the folder it holds up the embossing so it's easier to ink just the high spots.
ReplyDeleteYou can also use a brayer.
TFS
I also saw it on Pinterest! Tim Himself pinned it to his board!
ReplyDeleteI absolutely love what you've achieved!!!
ReplyDeleteI love it. Going to try it right now as I have the embossing folder. Yippee.
ReplyDelete