Tuesday 5 November 2013

Be True - With 7dots Studio

Its funny, sometimes you just find a range of paper that you love.. and one of those for me is the gorgeous 9th Wave from 7 Dots Studio.
 
It works really well for me, with my whole love of grunge and vintage, but I don't have to try and fight with mists and sprays.. cause being honest these scare me just a bit...  But anyway, that's enough about that, here is the tag I want to share with you, it uses some of the gorgeous 9th wave collection. In particular the reverse side of Deep Water.


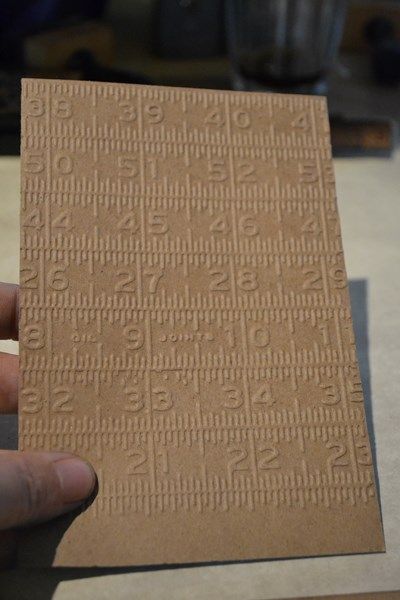
I started off by covering my tag with the Deep Water paper.. I used the top left hand section to cover my tag so that I could get some of the more plain and the grungier sections of the paper on the one tag.


My next step was to ink up some VLVS Rubber...
 
 
Coffee Ring Stain 2 3/4 x 2 1/4
 
stamp with Distress Ink, I used both Walnut Stain and Black Soot at once to give it a bit depth. I then did the same with the Chicken Wire
 
Chicken Wire 3 3/4 x 4 1/23
 
 stamp, and randomly stamped both on the tag. I also stamped Be True
 
Be True 3/4 x 1 1/2
 
on a piece of the Deep water paper the same way to use in the  Tim Holtz ornate frame. The ornate frame has been painted with Antique Linen Distress crackle paint, and inked with a bit of black soot distress ink when dry.


The next thing I did was of course to sew around the edges with my trusty sewing machine.. To finish off I added in a fussy cut butterfly coloured with distress markers ,some wire and twine, a metal corner, and number and some gorgeous Star Confetti from UmWow Studio..
 
Thanks for stoping bye, hope you enjoyed your visit
and hope to see you again soon.
 

Thursday 4 July 2013

Remembrance

Well July 4 has just arrived here in Australia, but that means that all my American friends will be getting ready to start their celebrations soon..
 
So I thought this would be the perfect time to share this tag..  To wish you all a very safe and happy 4th, and  as my little tribute to the fallen Prescott firefighters, who tragically lost their lives.
 
I've used one of the techniques that Tim Holtz has showcased in his July 12 tags of 2013..
 
JULYTAG
 
 
 I can tell this technique of using a brayer to add a block of stain to your background is going to become a favourite!!!


 So without to much more babbling on my behalf.. here is my tag..
 
 
and a couple of close ups.. and as always lots of idea- ology goodness..


So there you have it.. my tag..
 Thank you so much for stopping by
xxx


Tuesday 21 May 2013

Tick Tock..

So sorry about the very unoriginal post title.. but I must admit, I was at a bit of a loss as to what else to call it..

Recently I got myself one of the Tim Holtz assemblage clocks.. I wasn't really sure what I wanted to do with it, but I sat down at my desk after the little man had been put to bed, and just began to play.. it all actually started of with me finishing off my pocket watch.. and sort of went from there..

 Here is a little shot of the finished pocket watch before it went into the clock..

 
Then came the fun part adding it in to my clock, with a Tim Holtz lantern and fractured doll..

 
and adding in a few ideaology embellishments to finish it off..

 
and tahh dah it was all done. They really are lots of fun to make, and I think I could see myself having a play with another one, and maybe altering the actual clock itself a bit more...
 
Hope you are all having a wonderful Tuesday evening,  Thank you so much for dropping by,
Happy creating...


Saturday 11 May 2013

Double Trouble..

Well ok.. maybe not double trouble, but double embossed fun!!

Last week I had one of those.. hmm I wonder if this could work thoughts.. I thought I'd try and see what would happen if I embossed some cardstock first with an embossing folder and then with embossing powder.  So I decided to give it a go..  and this was the result..


So I thought I'd share with you all here the very easy steps of how I did it.. :)
 
I first cut my kraft cardstock to my desired size, then ran it through one of my favourite embossing folders.


I run mine back and forwards through my machine, just to make sure I get a nice crisp clear raised image.


The next step is to gently swipe your embossing ink over the raised parts of your embossed design. I find it works best if you have your cardstock sitting on a flat hard surface like your desk.


Next step was to sprinkle with your embossing powder,  shake off any excess powder, and then heat set it.


 I then cut my  double embossed design into strips.


The last thing I did was to ink them with various colours of distress ink.


They are then ready to add to your card, layout or project.


I hope you enjoyed my little tutorial, and would love to see if you have a go at using this technique.
 
I hope you have a wonderful day, and hope to see you back again soon :)

Thursday 4 April 2013

An amazing Surprise..

Howdy guys,
Hope you are having atruly wonderful Thursday ( or Wednesday)
 
I got the most amazing surprise when I checked out Tim Holtz's April tag and the winners of the March Challenge....
 
 There at position number 10 was my name... needless to say i was just a little excited!!..


It was such a wonderful surprise and i feel so very lucky and extremely humbled and grateful..
 
I'll kepp you posted and show you my prize goodies when they arrive!

Friday 15 March 2013

Easter Hunt Tag

I've been very slack lately with scraping photos.

So I've decided to do a quick catch up by doing some tags with some of my favourite photos from the last 12 months, to pop into my album here and there.  They may even find their way into a little tag sized album of their own, who knows?

This was Ash last Easter looking for eggs ... well actually it was a practice run, just incase we had bad weather Easter morning which we did, so I was lucky.

 
And a little close up and a few details. The heart is done with a page out of an old book. I've coloured it first with distress stain, then sealed both sides of the paper using glue and seal, just to help protect my photo. The word stickers are from the Seasonal Chit chat pack - these come in handy for all sorts of seasonal occasions, from Valentines day, Easter and Christmas, and who can go past a a tattered banner??  It's one of my favourite dies.


And a little close up and a few details. The heart is done with a page out of an old book. I've  coloured it first with distress stain, then sealed both sides of the paper using glue and seal, just to help protect my photo. The word stickers are from the Seasonal Chit chat pack - these come in handy for all sorts of seasonal occasions, from Valentines day, Easter and Christmas.

Friday 8 March 2013

12 tags of 2013 - March.

Howdy Guys,
 
what better way to kick off the first post of a shiny new
 
I love the whole concept of the 12 tags ..

This was Tim's example..


and this is mine..


This was such a fun tag to make, and was a nice happy spring alernative to all the rain that we have been having here the last month or so. I think my favourite part is my handcut grass and tattered banner ...
 
.
So thank you so much for droping by. I hope to see you again soon..
 
happy creating
xoxo