Tuesday, 21 May 2013

Tick Tock..

So sorry about the very unoriginal post title.. but I must admit, I was at a bit of a loss as to what else to call it..

Recently I got myself one of the Tim Holtz assemblage clocks.. I wasn't really sure what I wanted to do with it, but I sat down at my desk after the little man had been put to bed, and just began to play.. it all actually started of with me finishing off my pocket watch.. and sort of went from there..

 Here is a little shot of the finished pocket watch before it went into the clock..

 
Then came the fun part adding it in to my clock, with a Tim Holtz lantern and fractured doll..

 
and adding in a few ideaology embellishments to finish it off..

 
and tahh dah it was all done. They really are lots of fun to make, and I think I could see myself having a play with another one, and maybe altering the actual clock itself a bit more...
 
Hope you are all having a wonderful Tuesday evening,  Thank you so much for dropping by,
Happy creating...


Saturday, 11 May 2013

Double Trouble..

Well ok.. maybe not double trouble, but double embossed fun!!

Last week I had one of those.. hmm I wonder if this could work thoughts.. I thought I'd try and see what would happen if I embossed some cardstock first with an embossing folder and then with embossing powder.  So I decided to give it a go..  and this was the result..


So I thought I'd share with you all here the very easy steps of how I did it.. :)
 
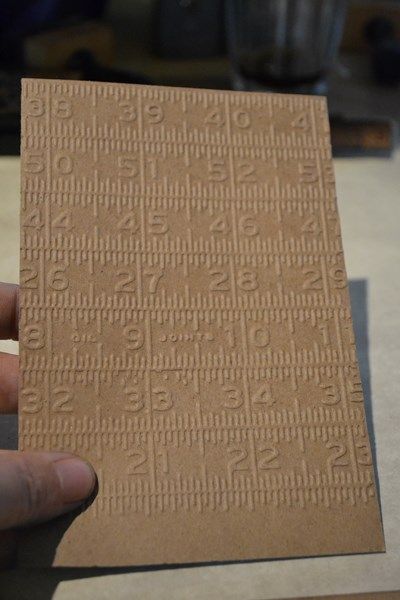
I first cut my kraft cardstock to my desired size, then ran it through one of my favourite embossing folders.


I run mine back and forwards through my machine, just to make sure I get a nice crisp clear raised image.


The next step is to gently swipe your embossing ink over the raised parts of your embossed design. I find it works best if you have your cardstock sitting on a flat hard surface like your desk.


Next step was to sprinkle with your embossing powder,  shake off any excess powder, and then heat set it.


 I then cut my  double embossed design into strips.


The last thing I did was to ink them with various colours of distress ink.


They are then ready to add to your card, layout or project.


I hope you enjoyed my little tutorial, and would love to see if you have a go at using this technique.
 
I hope you have a wonderful day, and hope to see you back again soon :)